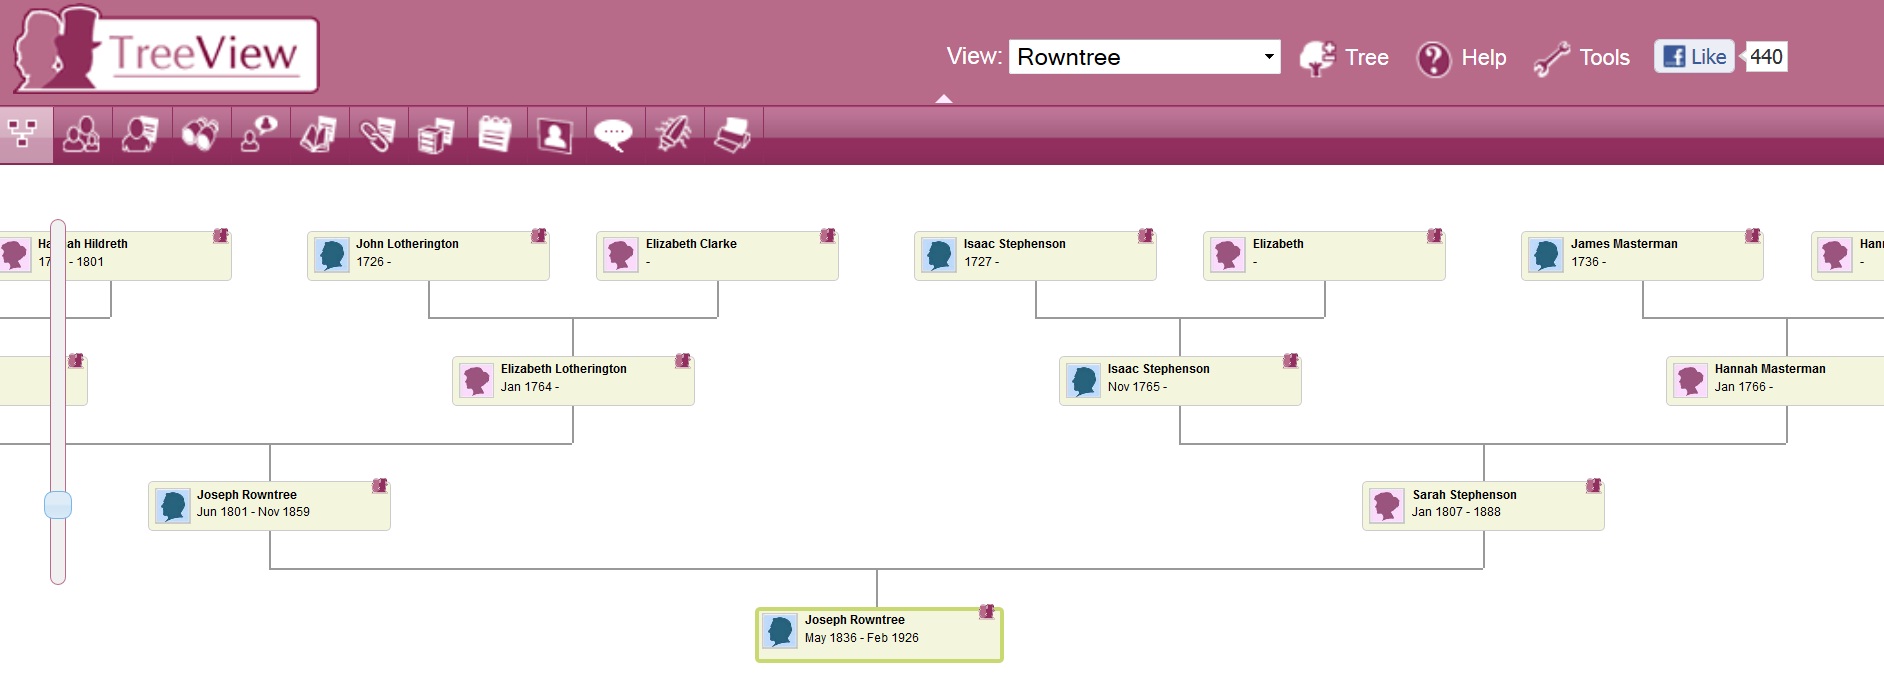
The TreeView Menu
![]()
Family
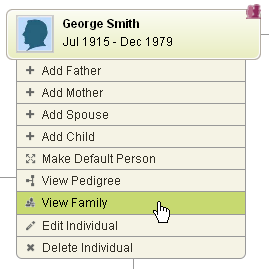
Before selecting this option you need to ensure that the person you want to view family details for is in the prominent left position. The easiest way to do this is to hover your mouse over the individual and select 'View Pedigree' from the drop-down menu. Your screen view will then shift to make the selected individual the first person on the tree. If you select 'Family' from the main menu, you can then view details of this person's immediate family, which includes their spouse, children, parents and spouse's parents.
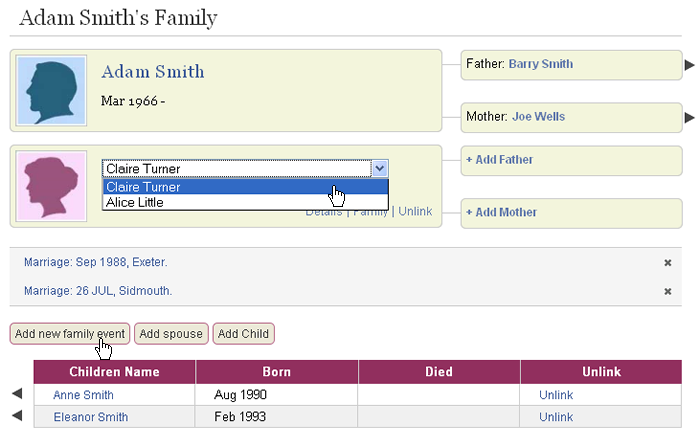
You can view and edit details of each person listed in the Family view by clicking on them. To add new children to the family select the 'Add Children' link. If the main individual was married more than once, or had children with more than one person, click on 'Add spouse to create family' to include a new spouse/partner. You can enter a new individual as the spouse/partner or select an existing individual. When multiple partners have been added, you will notice a drop-down box under their name, which allows you to alternate between them. When you select the 'family' link under the spouse's name, this will turn them into the main individual within Family View, and allow you to enter additional partners for them if necessary.
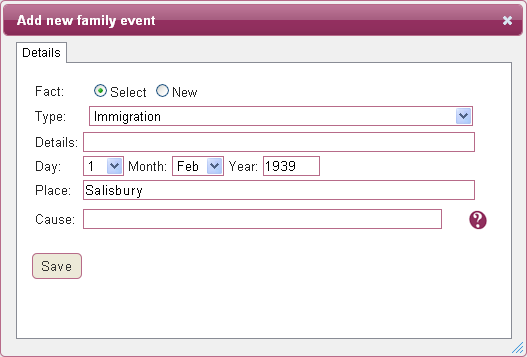
There is also the option of adding an event to the Family view such as emigration, retirement, divorce...etc. Select 'Add new family event' and a 'New Fact' window will appear where you can select a specific event from the menu or create your own event by changing to 'new'.
People
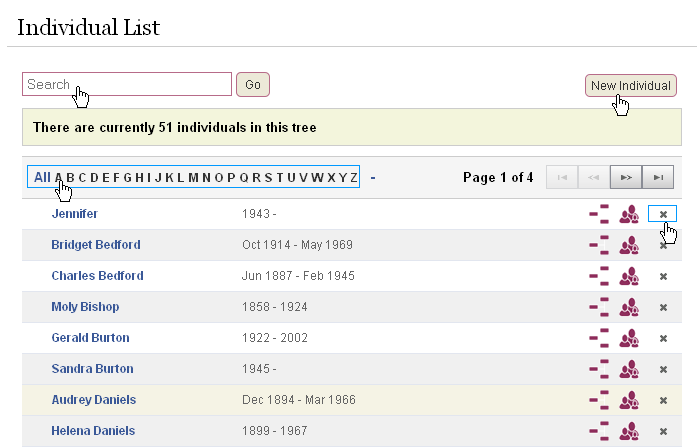
This provides a master index of all individuals within your tree and includes a surname filter, so you can click on a letter to only view people whose surname begins with that letter. There is also a name search available, where you can type any part of the name that you wish to search for.
You can add new people to the list by selecting the 'New Individual' link. These people can then be included on your tree at a later date.
For each person listed, you can click on their name to view and edit the individual's details. There is also the option to delete the individual by clicking on the 'Delete' link provided. The 'Family View' link will show you the immediate family details of the individual as per the main 'Family' tab detailed above. The 'TreeView' tab will take you to the Pedigree view with the selected individual as the main person on the tree.
Full Tree
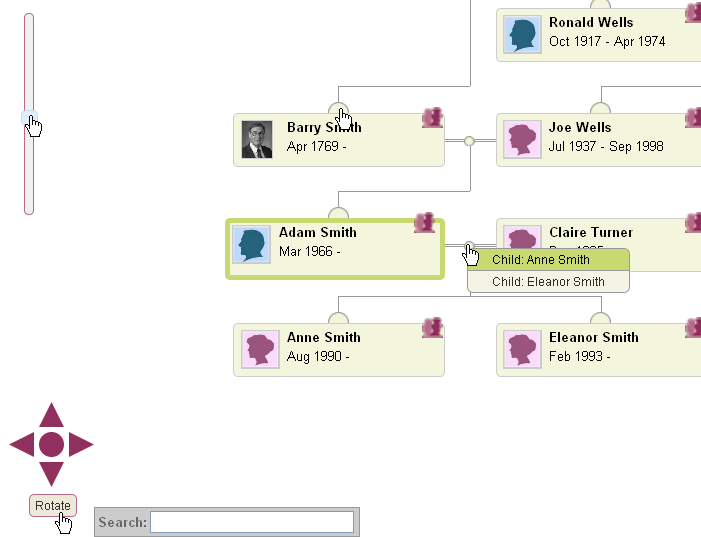
This is a new feature to TreeView and allows you view your whole tree on one page, with tools available to navigate across the different generations. To zoom in and out, use the scroll bar on the left hand side.
You can manoeuvre around the tree by holding down your left mouse button, and dragging the page across until you reach the area of the tree you wish to view.
To navigate across large areas of your tree more quickly, use the directional tool in the bottom left of your screen, which will move you across the tree in a left, right, up or down direction. Click on the central box to return to your default individual. You can also adjust which person on the tree is set as the central position by mousing over an individual and selecting ‘Make Default’. The default individual will be highlighted by a green border.
Hover over the node between a couple to see their children, and on the semi-circle node above an individual to view their parents.
The standard alignment of your tree is set as vertical, but you can if you prefer change this to horizontal so that your tree runs from left to right by selecting ‘Rotate’ in the bottom left of your screen.
There is a search bar available so you can enter any part of the name and see all results available within the tree. Select the person you were searching for and you will be taken directly to that person.
Search
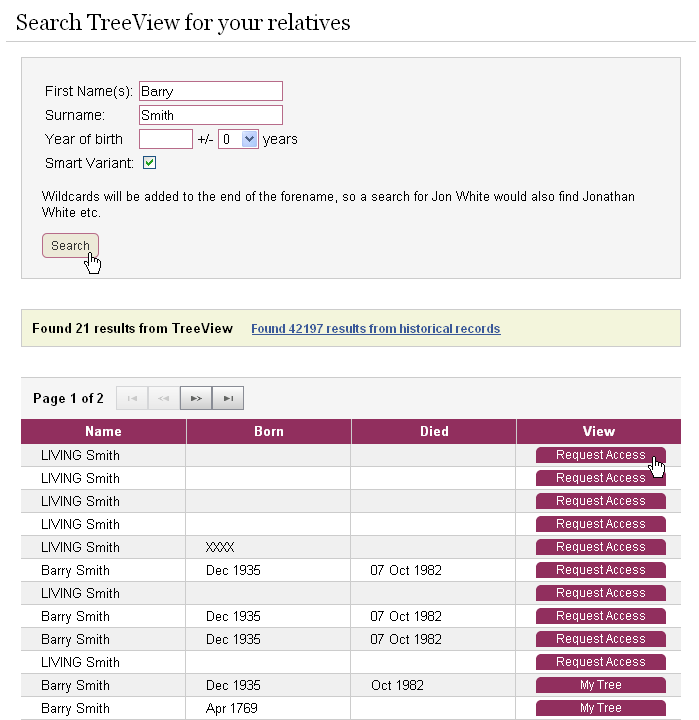
This is another new feature to TreeView, which allows you to search for your relatives on other people’s trees. Please note that this feature requires a subscription. If your TreeView is set to ‘Public’ in the Privacy Options (found under Tools), anyone searching for an individual who appears on your tree will see this result and can then choose to view your entire tree. The viewer will not have access to any of your personal account details, and only the surname for living people is displayed.
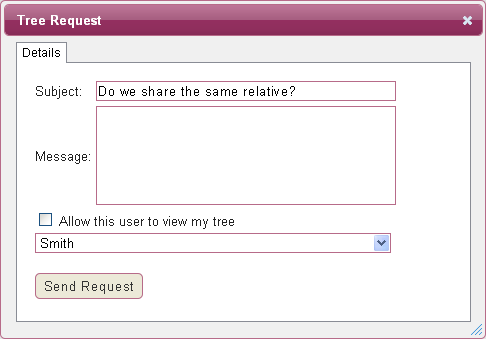
If your TreeView is set on 'Private' this will block everyone from searching your tree and none of your individuals will appear in other users' search results. You can also set your tree to 'Invitation Only' so individuals in your tree will appear in search results, but the person wishing to view details will have to request permission from you before they can view your tree. You will find details of requests to view your tree under 'Friends'. When you send a request to view someone's tree, you can indicate whether you want to allow this person access to your tree and also include a message with your request.
Friends
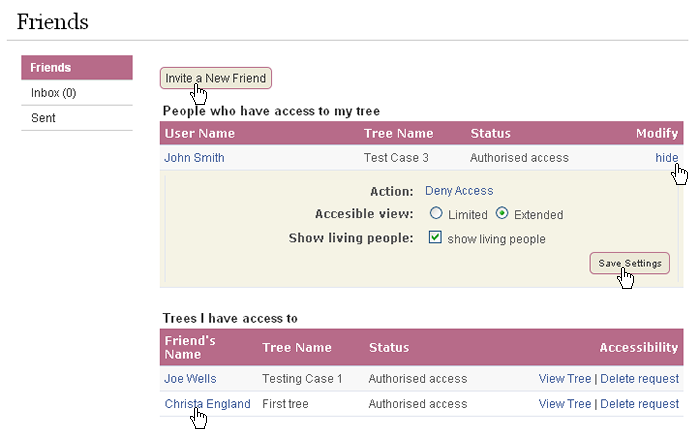
In this section you can keep track of which tree's you have requested to view after searching for a specific individual, and view the outcome of your request. You can also see people who have requested access to your tree and whether you have granted access. Access to your tree can be amended at any time by using either the 'Accept access' or 'Deny access' links.
To amend the type of access your friends have to your tree, under ‘People who have access to my tree’, select the ‘change’ option under ‘Modify’ to see their access settings. If their accessible view is on ‘Limited’ they will be able to see people on your tree but not view any of their full details such as facts, notes, address etc. If you change this to ‘Extended’ they will be able to view all the details of individuals on your tree. You can also protect the living relatives on your tree by ticking or unticking the ‘Show living people’ box. Once hidden, these individuals will show on your tree with only a surname, e.g. ‘Living Smith’ and no personal details displayed.
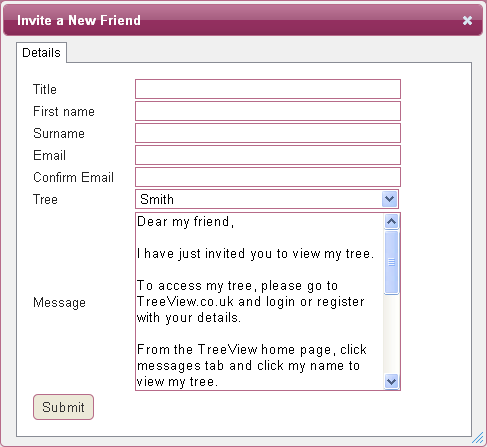
An option is available to invite other users to view your tree. Select ‘Invite a friend’ to enter the name and email address of the person you wish to invite and which tree you want them to have access to. You will have a record of everyone that you have invited, and below this you will see invitations from other users to view their tree. Select the appropriate link under ‘Action’ to accept or decline the invitation.
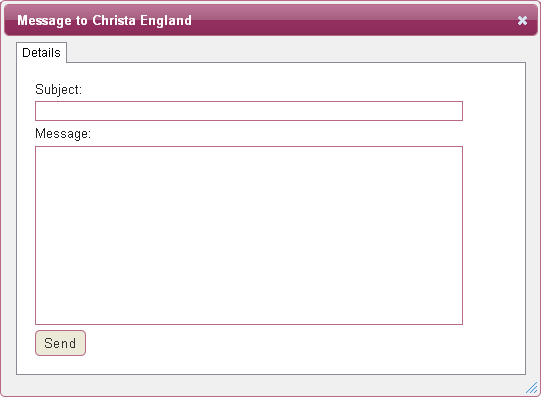
You can also send messages to existing friends by clicking the relevant person's name. Your outgoing messages will be saved in the ‘Sent’ folder and replies you receive will be displayed inside your ‘Inbox’.
Friends Access (Role):
As before you can invite friends to view your tree and set a level of access for individual friends.
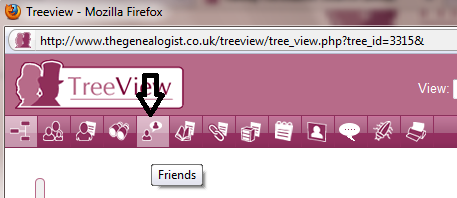
From the TreeView menu, click the Friends icon.

People who have access to your tree will be listed and you will see a Change link under the Modify column, click this to alter the settings:
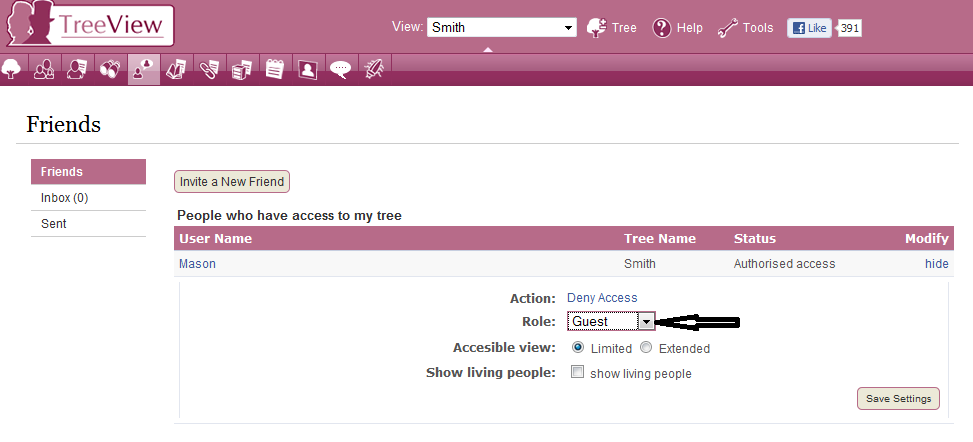
If their accessible view is on ‘Limited’ they will be able to see people on your tree but not view any of their full details such as facts, notes, address etc. If you change this to ‘Extended’ they will be able to view all the details of individuals on your tree. You can also protect the living relatives on your tree by ticking or un-ticking the ‘Show living people’ box. Once hidden, these individuals will show on your tree with only a surname, e.g. ‘Living Smith’ and no personal details displayed.
In addition to the access level you can now set a Role for your friends. You can select either ‘Guest’ or Proposer.
A ‘Guest’ can simply view your tree within the limitations which you have set regarding limited or extended view and living people.
A ‘Proposer’ can add comments to individuals on your Tree.
Giving a friend the role of a Proposer automatically allows them extended access to your tree, however you can still set the living people option.
Your ‘Friends List’ will display the Roles you have set for each person with access to your tree:

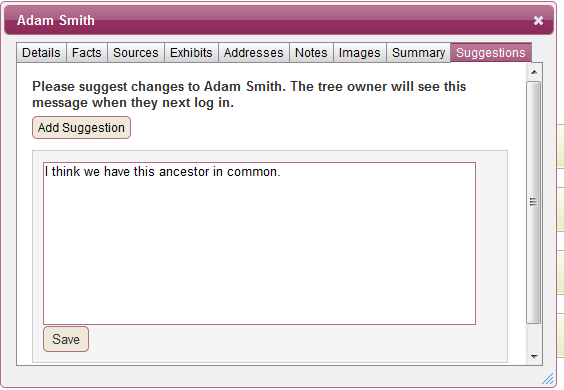
Proposer’s to your tree can simply click on an individual and select the Suggestions tab to enter their comments:
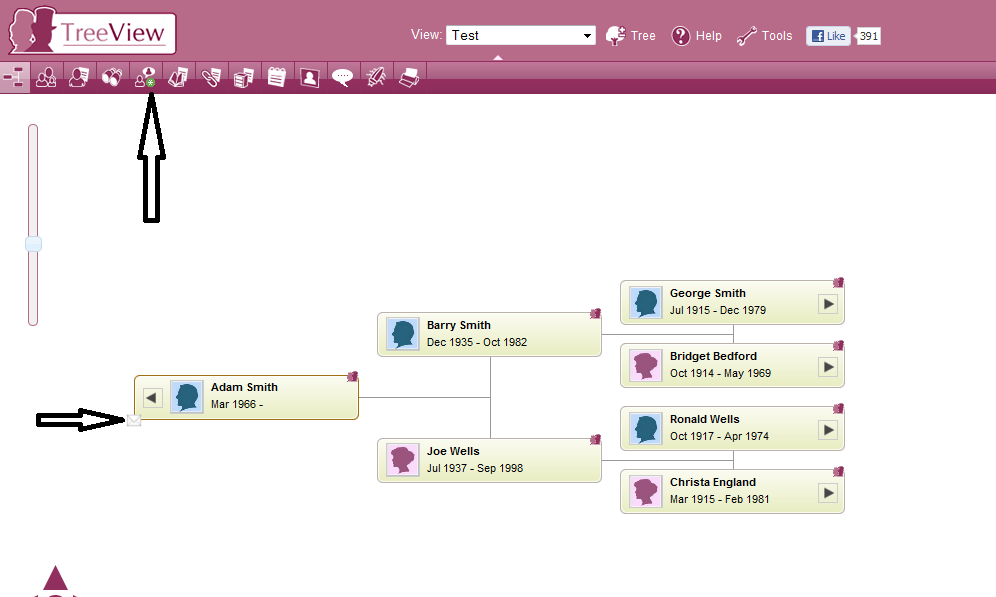
If any of your friends add comments to your Tree, next time you log in, you will see a message icon on your tree and also a star on your Friends icon:
To view the comments you can either click on the Individual:
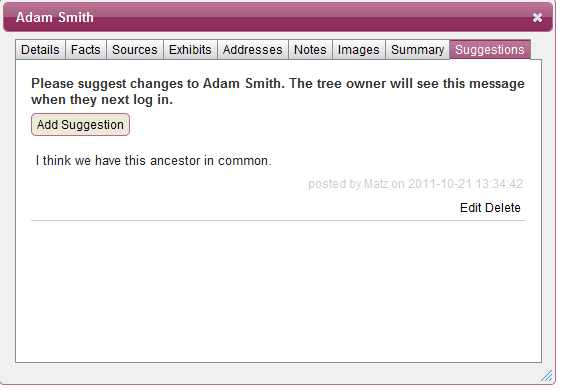
From here you can Edit or Delete the comment if you wish.
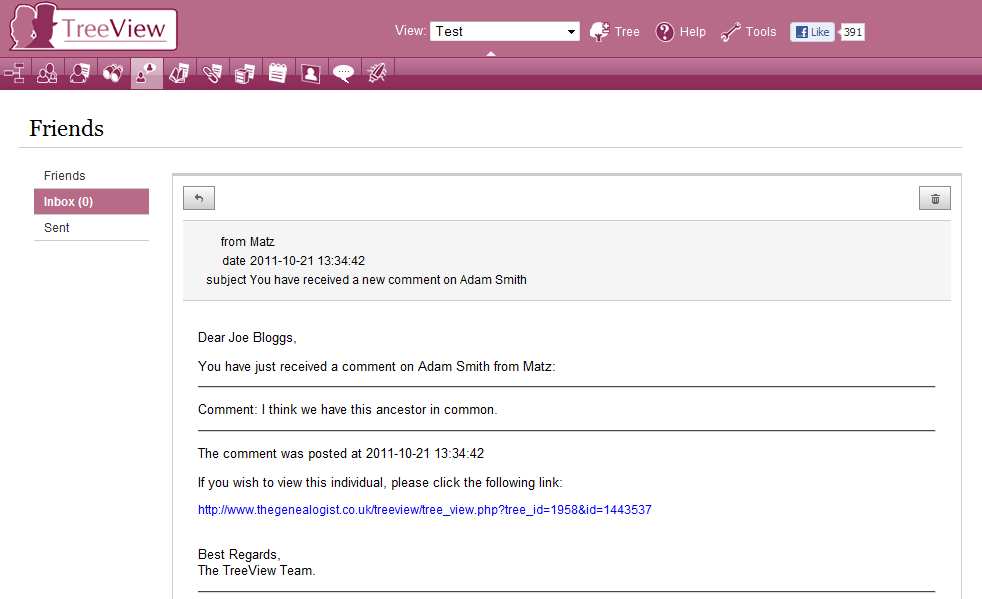
Or you can click on the Friends button and click on your inbox:
Source List
Any sources that you have added to individuals in the 'Edit Individual' option will be listed here. You can view each source or delete them by using the links provided. You can also include new sources by selecting the 'New Source' link. You can then add these new sources to specific individuals at a later date by following the directions on 'Sources' in the 'Edit Individual' section of the help guide, and changing the preference from new to existing when adding a source to that individual.
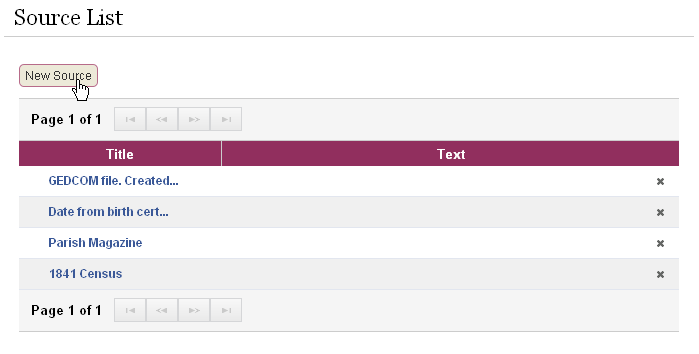
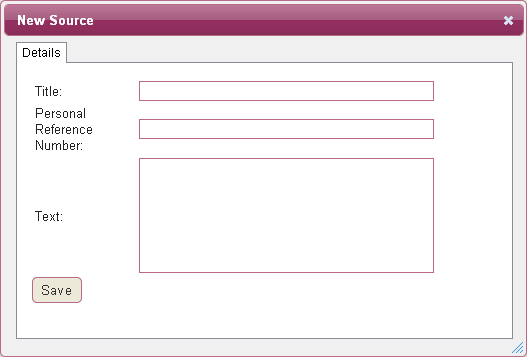
Exhibit List
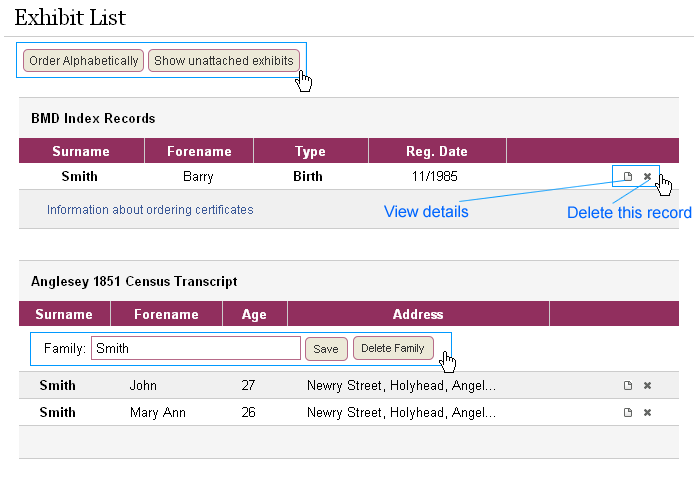
Any exhibits that you have saved on TheGenealogist will be stored in your Exhibits List, and you can link these to specific individuals as evidence (see 'Editing an Individual).
The exhibits can be arranged either by record type or alphabetically, and you can change which exhibits are displayed in the list by changing the preference between 'Show all exhibits' and 'Show unattached exhibits'.
The icon provided to the right of each exhibit allows you to view full details of the record saved and add your own comments. There is also a delete icon to remove the exhibit from your list.
For census exhibits, you can add a family name in the box provided, and delete individuals by using the remove icon provided or delete the entire family using the link located next to the family name box.
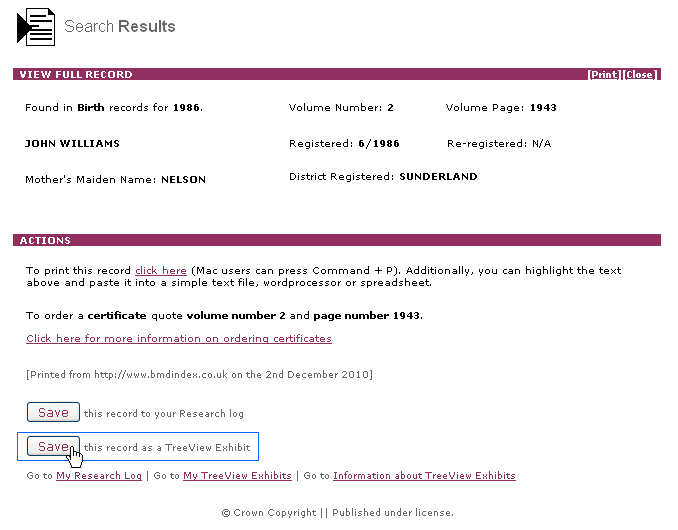
To add an exhibit to TreeView, first find and view the record you wish to add:
BMD Example:
Census Example:
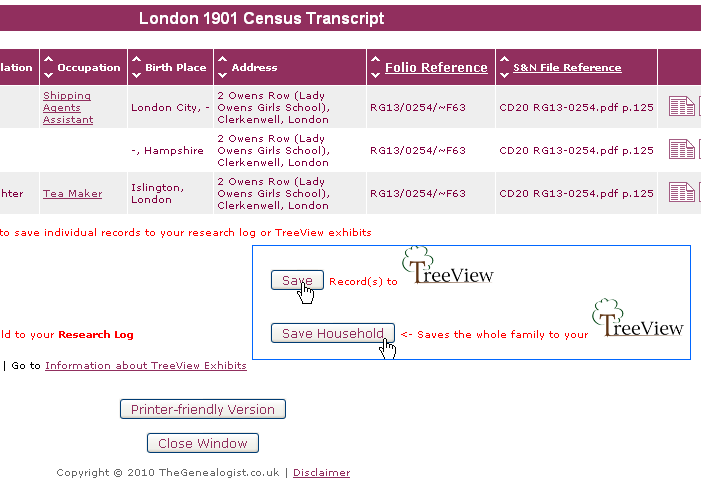
To add an individual census record, select 'Save record(s) to TreeView' link. You can also add a census household or family to your TreeView exhibits; when doing a census household or family search, just click the ' Save Household to your TreeView' button.
Once you have added your exhibits to TreeView, you can view them in the exhibit list.
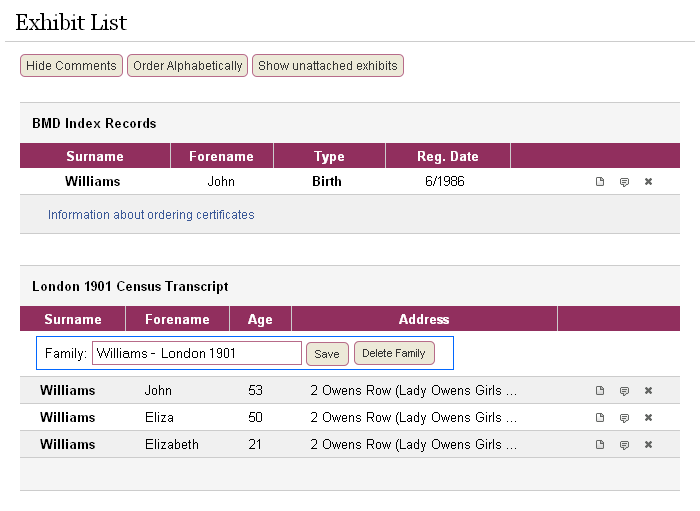
In the screenshot above, you can see the first exhibit is an individual BMD birth record for John Williams in 1986 and below you can see a family I have added from the London 1901 census and have named 'Williams - 1901'.
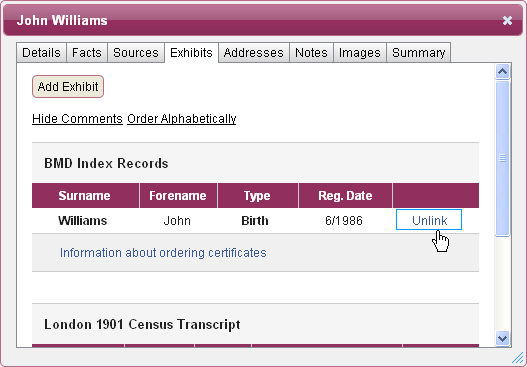
You can attach exhibits to individuals and facts, to do so, view the individual/fact you wish to attach an exhibit to, go to the exhibit tab and click the "Add Exhibit" button. You will then be given a list of exhibits, just click select on the exhibit you wish to attach and you will then see that exhibit listed under the exhibits tab. If you wish to detach the exhibit from the individual/fact, just click "Unlink" next to the exhibit:
Repository List
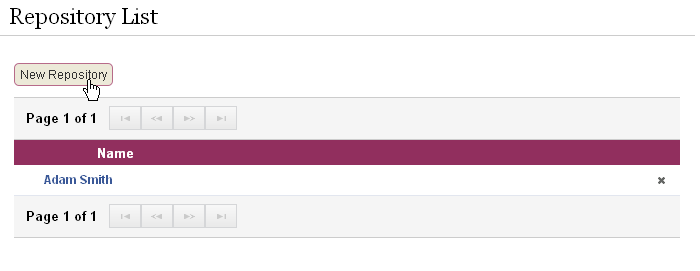
Repositories are 'Information Stores' such as a family record centre, The National Archives or even a library. Repositories are where sources come from; you can record a repository's information so that you can contact a particular repository again in reference to a particular source that you received from them.
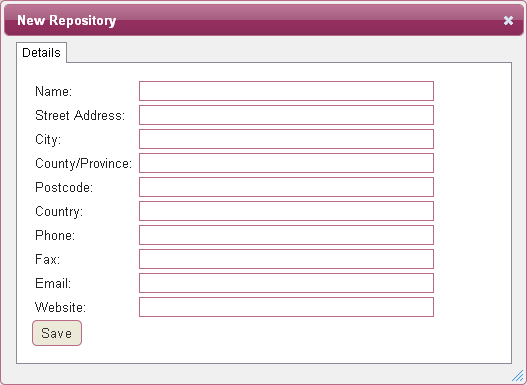
To add to this list, select the 'New Repository' link and enter details, then click save. You will then receive confirmation. Click "ok" or close the window to proceed.
Note List
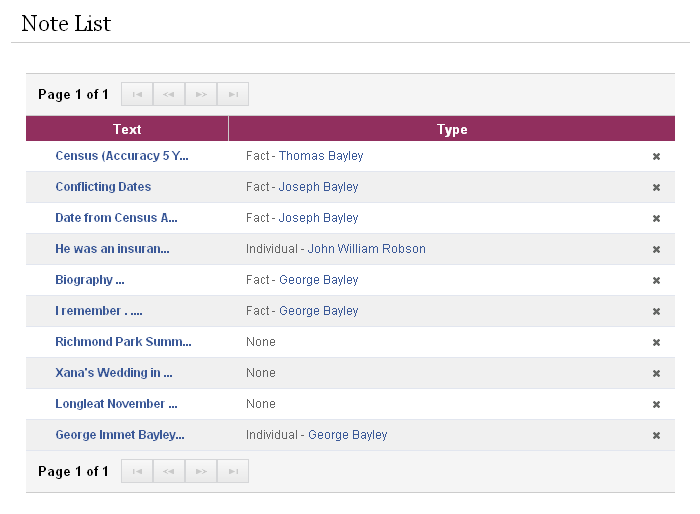
This section shows all notes that have been added to individuals on your tree. Clicking on the text of each note, will open up a new window giving you the option to edit the note and add sources. The name of the individual linked to the note appears in the second column, if you click on this you’ll be able to view and edit full details of the individual, and also edit the note by using the unlink/view/delete links available
My Photos
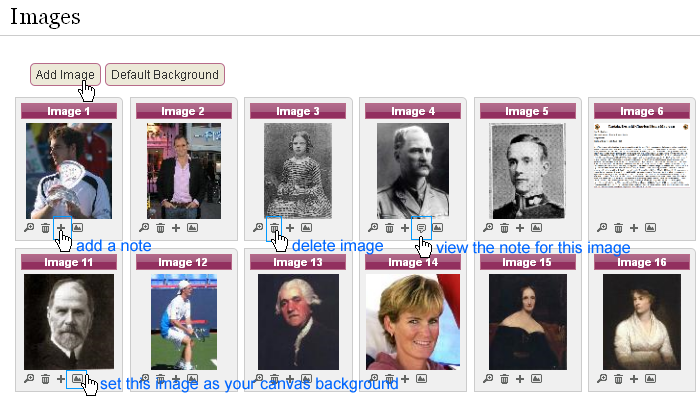
Select 'Add Image' to upload pictures from your computer to TreeView, which you can then attach to specific individuals on your tree. The image will be displayed on both the Pedigree and Family view alongside the individual's information.
The first icon shown on each image is a magnifying glass, which will open the image in a larger viewing window. The second icon is a rubbish bin, which will delete the image when selected. The third icon is a plus symbol which will allow you to add a note to the selected image. Enter the details in the box provided and click ‘Save’.
The final mountain icon allows you to set the image as a background to your tree. You can choose whether you wish to have the image fit to the whole window, just in the centre or tiled. To remove the background image, use the ‘Default Background’ link.
Please note, unless you have a Premium subscription you will only be able to upload a maximum of 6 image files. For subscription options please see: www.TheGenealogist.co.uk
Custom Tree
Don’t want everyone in your chart? Then you can use our Custom Tree facility. This option allows you to specify who to include on the tree.
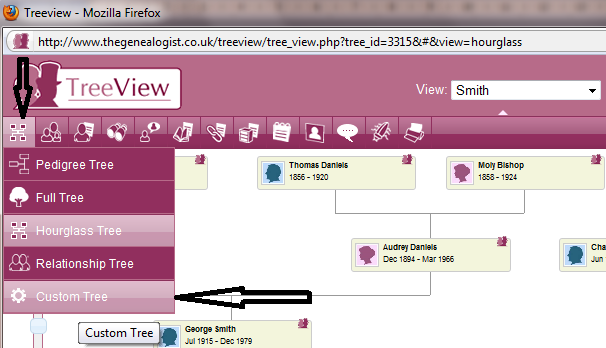
To produce a Custom Tree, from the Tree Menu on the far left of your TreeView Menu, select Custom Tree:
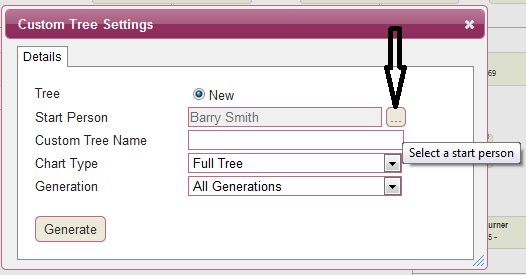
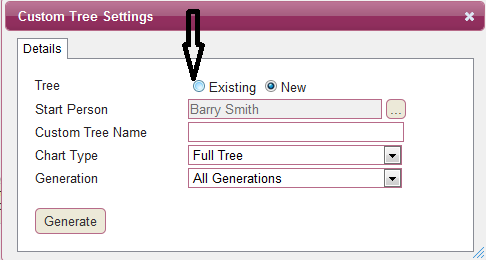
The custom tree setting window will then open. The default person in your tree will show as the default start person.
If you wish to use another ancestor as the Start person for your tree please press the Select Start Person button and select an ancestor from the list.
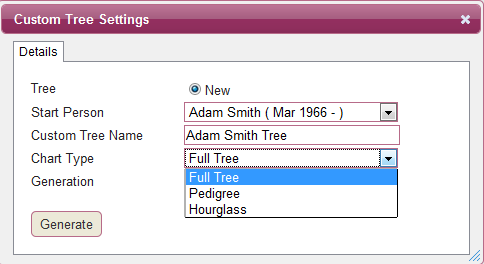
You will need to give your tree a name and select a Chart type from Full Tree, Pedigree and Hourglass:
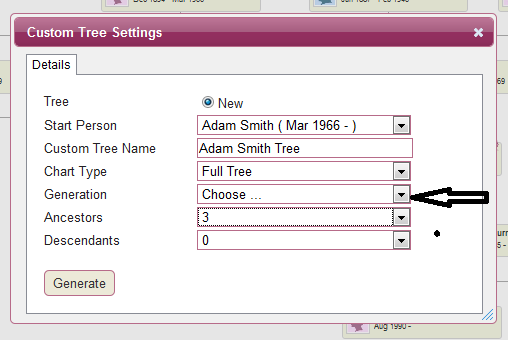
Finally you can choose the number of Generations to include. The default will be set to All Generations however if you select Choose you can set the number of Ancestors and Descendants and click Generate.
Your chart will be displayed on screen. You can then use the Drag and Drop charting facility to move your boxes around and set the layout of your Tree.
To move a node please click on box you wish to move, the box will turn blue, you can then drag the box and drop it into the new position:
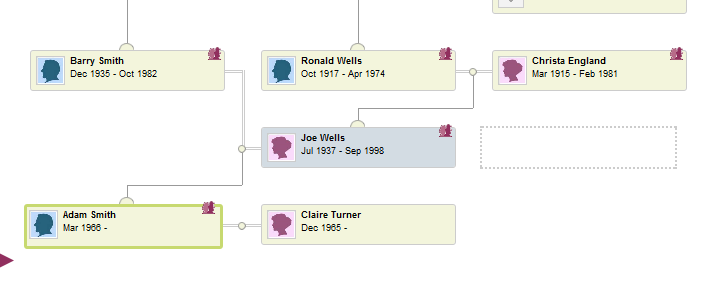
If you would like to ‘hide’ certain nodes from your tree, you can hover over the node and you will see a small cross appear in the top left corner. Click this to remove that node from the Tree. Don’t worry you can restore them later if you wish:
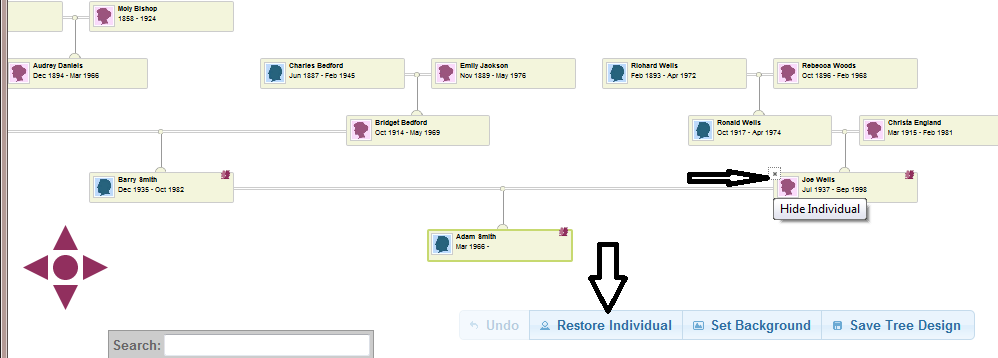
To restore a hidden node please click on the Restore Individual button, a list of the hidden nodes will appear and you can click and drag the one you require from the list and drop it back onto the tree:
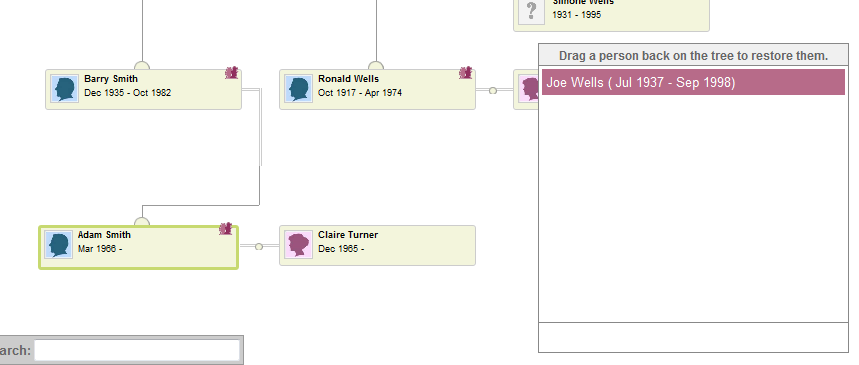
Once you are happy with your Custom Tree you can Save it using the Save Tree Design button:
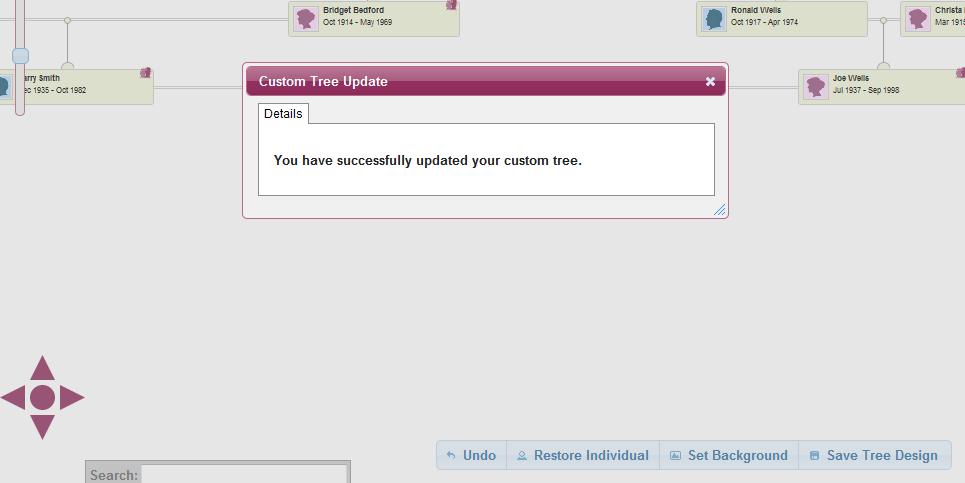
If you wish to return to this tree at a later date please select Custom Tree from the Tree Menu on the far left of your TreeView Menu.
From the Custom Tree settings window you can select Existing:
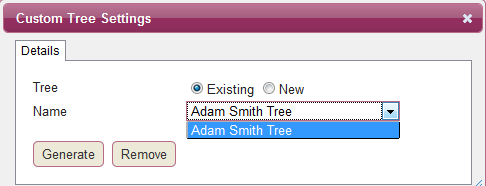
Select which Custom Tree you wish to use again from the list and click Generate:
Hourglass Tree
An alternative design for your tree is an Hourglass Tree, this will take the default person from your tree and include both ancestors and descendants of that person.
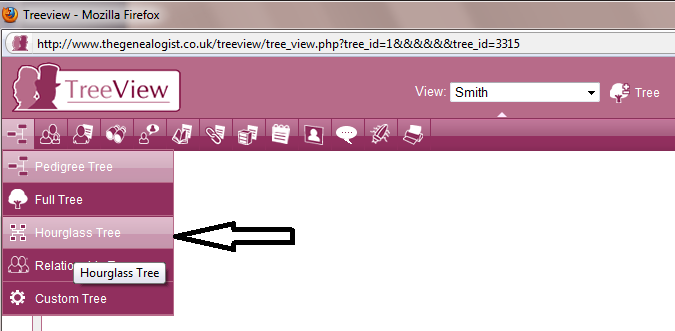
To produce an Hourglass Tree, from the Tree Menu on the far left of your TreeView Menu, select Hourglass Tree:
Your tree will be created automatically and displayed on your screen:
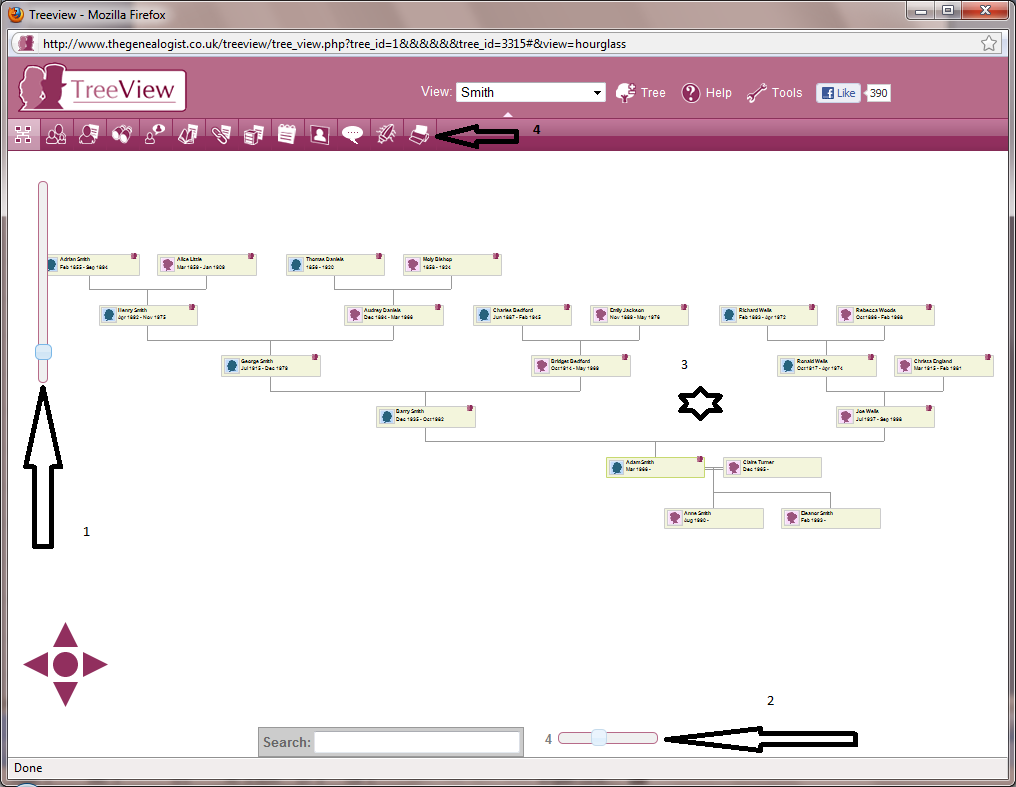
1: Use the scroll bar to enlarge or reduce the size of the tree.
2: Use this bar to set how many generations are displayed in your Tree.
3: Click and hold any blank space within the tree and move your tree around the page.
4: This tree can printed using the Print icon from the TreeView menu. You will be asked how you would like your tree printed? Once you have selected All in One or Several Pages, a PDF file will be emailed to you which you can then print.
TreeView offers two different options for printing from all of the chart facilities.
Once you have created your tree and are happy with it, click on the Print icon from TreeView menu.
A small window will appear asking how you would like your tree to be printed?
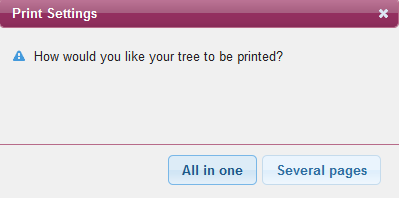
You can select one of the following:
All in One: This option is for those who would like their tree printed on one sheet of paper and if you have a commercial printer or access to one you can use this option.
Or
Several Pages: This option will divide your tree over several A4 sheets of paper allowing you to print from a standard printer at home. The A4 sheets are then discreetly numbered making it easier for you to piece them together once they have printed.
Either way a PDF file will be created and emailed to you.
Once you have received your PDF file, you can open the file and print your Tree.
To print out the preferred size of your chart, please make sure you have the latest Adobe Reader installed in your operating system. You can download Adobe Reader free from http://get.adobe.com/uk/reader/.
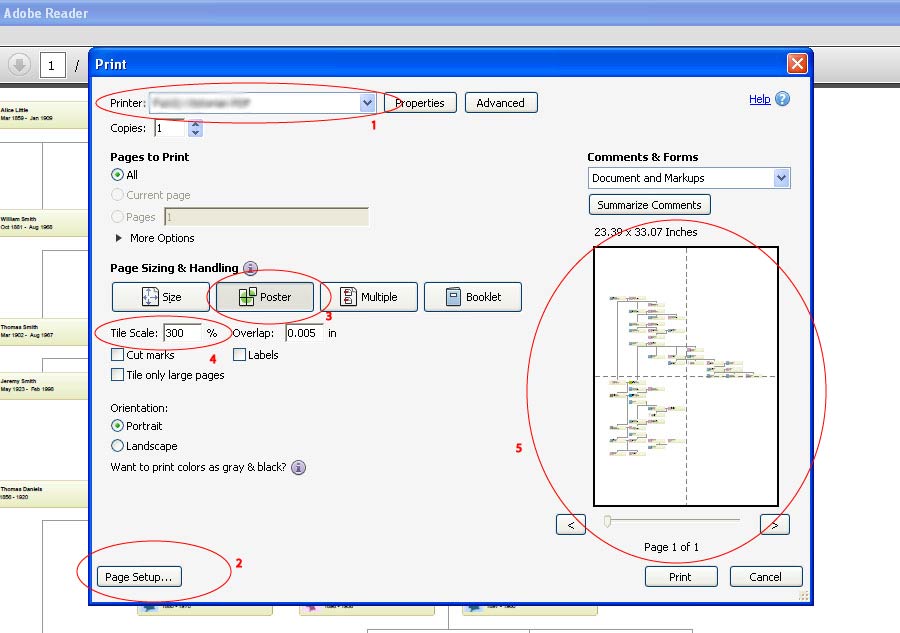
When printing an all-in-one chart file with Adobe Reader, please select "File" from the toolbar at the top
and then "Print". Under the "Page Sizing and Handling" section, click the "Poster" button. You can then
increase the figure in the "Tile Scale" column. After changing the value, click in the overlap box, this
should update the preview. Make sure the preview screen on the right shows the number of pages you wish to
print. When you are happy with the preview, click the print button in the bottom right hand corner.
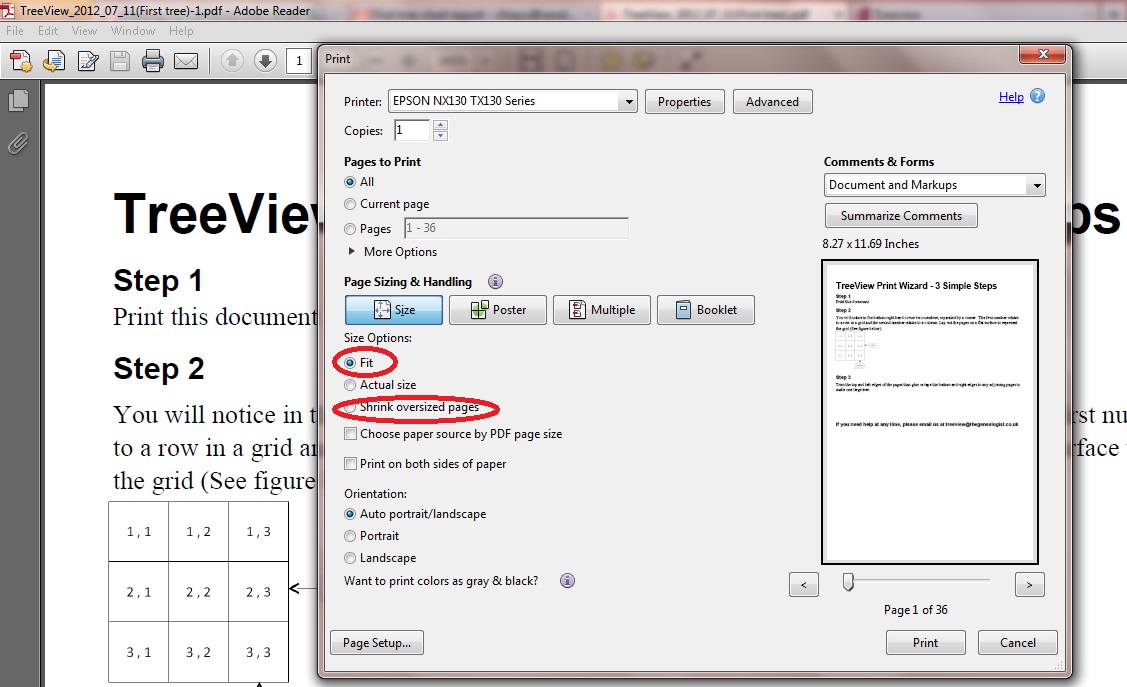
If it is a chart file with several A4 pages, click the "Size" button under the "Page Sizing and Handling"
section. Please select "Fit" or "Shrink oversized pages" radio button under the "Size Options". That shall
enlarge or shrink the chart to fit the whole A3 paper size or which ever size paper you wish to use.
Relationship Calculator
As well as the Relationship Tree you can calculate the relationship between any two ancestors in your tree from the Tools Menu.
From Tools, you can select Relationship Calculator:

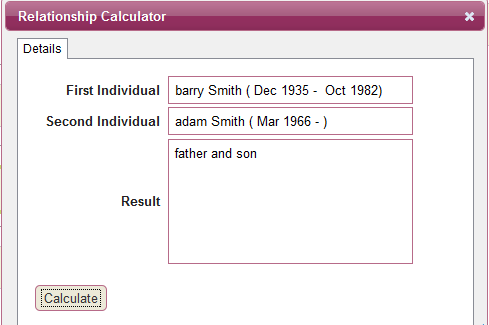
A new window will appear for you to enter the names of the two ancestors for whom you wish to see the relationship:
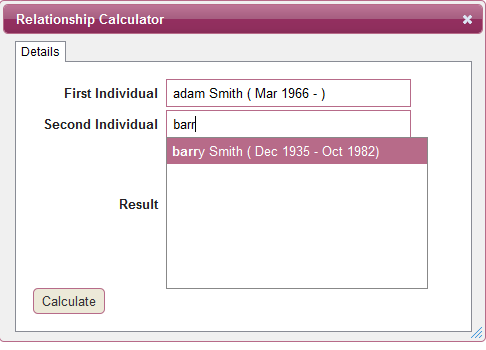
You can begin typing the name of the First Individual and select the correct entry from the list.
You should repeat this to enter the name of the Second Individual.
Once you have selected both individuals please click Calculate.
The relationship between the two Ancestors will be shown in the Results box.
Back Up and Restore
TreeView now offers a Backup and Restore feature, allowing you to routinely save your Tree and restore from previous files if needs be.
From the Tools Menu, select Backup or Restore:

Back Up:
From the Tools Menu, select Backup or Restore: Your Back Up/ Restore window will appear:
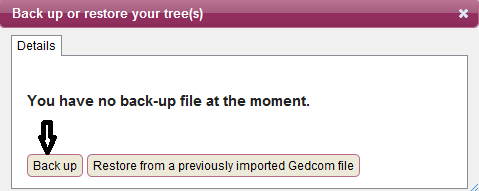
Please click on Back up.
You will need to choose which Tree you wish to Back up from the list, once the correct Tree is selected, press Back Up.

Please click OK and wait for your Back up to complete. You will receive a message to confirm the Back Up was successful.
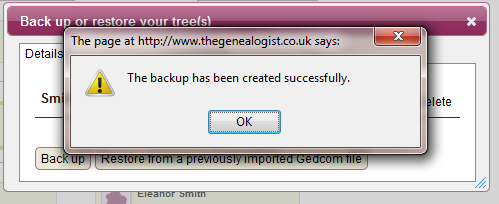
Click OK.
This Back Up will be stored in your list of Back Ups until you use it to restore your tree:
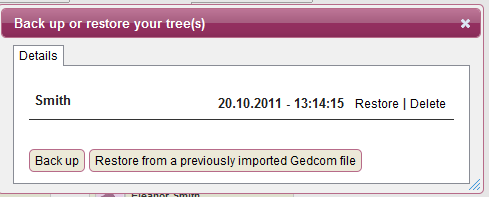
From here you can Restore or Delete your Back up file.
Should you wish to restore from your Back Up file, please press the Restore link and wait for the restore to complete. Click OK.
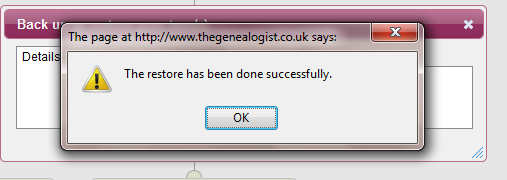
Restore:
From the Tools Menu, select Backup or Restore: Your Back Up/ Restore window will appear:
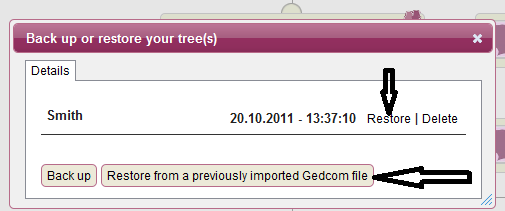
If you have a Back Up stored, you can either restore from your Back Up by pressing the Restore link and wait for the restore to complete.
Alternatively you can restore from a previously imported GEDCOM file using the button towards the bottom of the window.
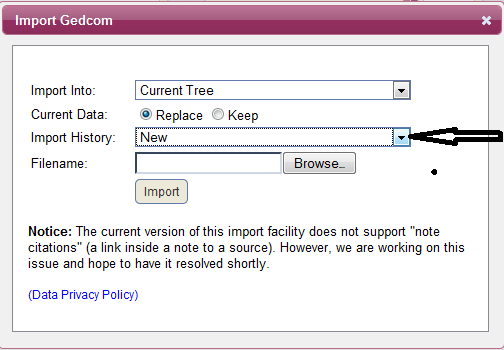
You will need to select where to import the file, either the Current Tree or Select New from the list ‘Import Into’.
You will also need to select whether you wish to Replace or Keep the Current Data.
From the ‘Import History’ drop down box you can select a file from the list of GEDCOM files which you have previously imported to TreeView.
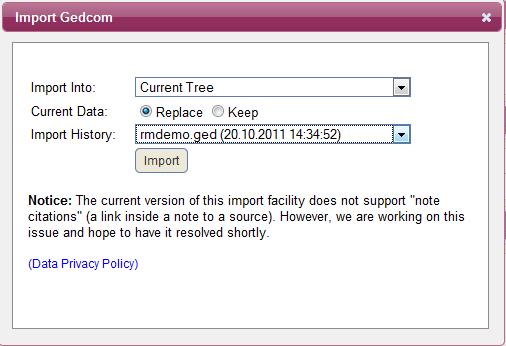
Once you have selected the file you wish to import, click Import.
You will receive a message to confirm your Import Settings. If you are happy press OK if you would like to adjust your settings press Cancel.
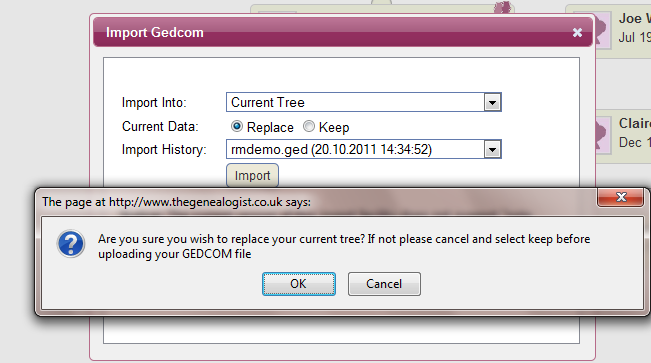
Once you have clicked OK, the import will begin and you will receive the following message once the GEDCOM has imported successfully:
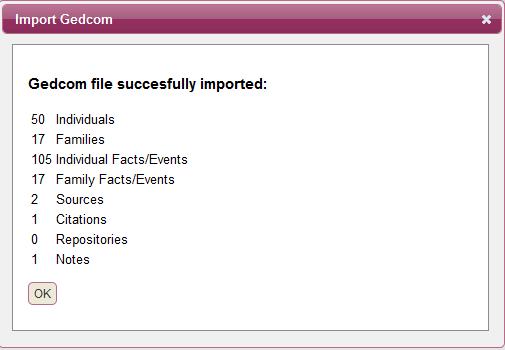
Click OK to return to your Tree.
Importing GEDCOM files:
From the Tools Menu, select Import:

The Import window will open:
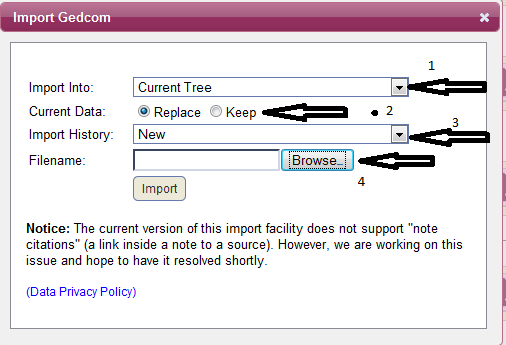
1: You will need to select where to import the file, either into the Current Tree or select New from the list ‘Import Into’.
2: You will need to select whether you wish to Replace or Keep the Current Data.
Please remember if you select Current Tree and Replace any data currently on your tree will be overwritten with data from the GEDCOM file.
3: From the ‘Import History’ drop down box you can select a file from the list of GEDCOM files which you have previously imported to TreeView.
4: You can select a GEDCOM file which is stored on your PC or portable storage device buy clicking Browse.
Click Import.
Relationship Tree
Registered users of TreeView.co.uk and TheGenealogist.co.uk will now be able to access the new Relationship Tree.
Once you have opened your tree, the TreeViews icon on the far left of the menu will provide the tree options available to you.
A small window will appear for you to select the two individuals you wish to use for the Relationship Tree:
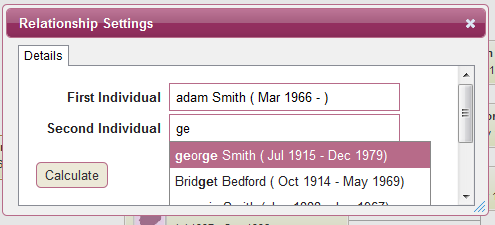
You can begin typing the name of the First Individual and select the correct entry from the list:
You should repeat this to enter the name of the Second Individual.
Once you have selected both individuals please click Calculate.
Your Relationship Tree is then displayed on screen:
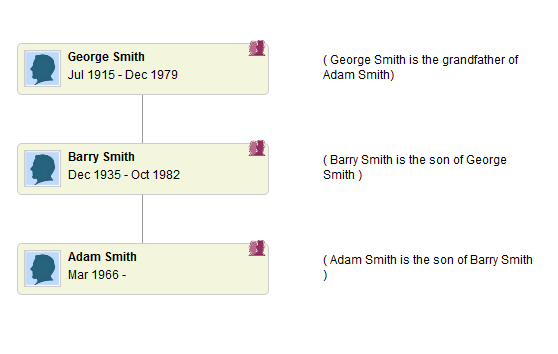
A copy of this Tree can be printed by clicking on the Print icon from the menu at the top of your TreeView window.
Using the relationship facility from the Pedigree or Full Tree option:
If you are looking at your Full Tree or Pedigree view, you will have the default person selected (highlighted with a green line around the box).
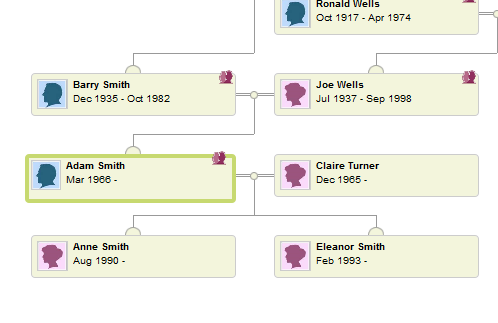
If you click to open the details for anyone other than the default person you will see their relation to the default person.
For example if you were to click on the Mother of the default person (Adam Smith), her details would show as:
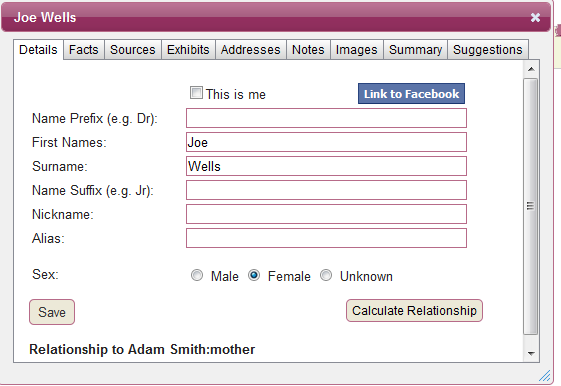
From any Tree you can click to view the details for an individual, on the main details window will be a Calculate Relationship button, which you can also use to calculate their relationship to anyone else in your Tree.
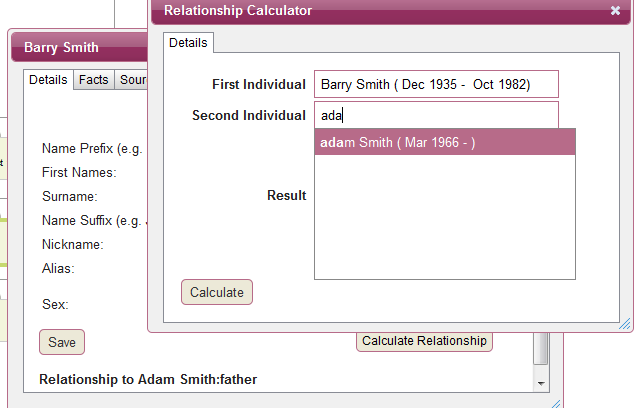
The first individual will automatically be entered for you, so simply enter the name of the Second Individual and click Calculate:

Pedigree
The Pedigree view shows your information in a standard tree format, with your default individual at the root of the tree. Any images that you have linked to individuals will also be visible. You can use the arrows on the individuals located on the far left and right of the screen to move up and down the different generations. If you do move away from the default individual, you can return to them at any time by clicking on the grey 'Select Default Individual' tab which appears at the bottom left of the screen.


The scroll bar located on the left hand side will allow you to change your current view by zooming in and out. If you find after zooming in, your view of the tree is now limited you can move the tree around to view different areas by holding down the left button on your mouse and dragging the tree to preferred position. There are also navigation arrows available in the bottom left corner which will take directly to specific areas of the tree or return you to the default person.
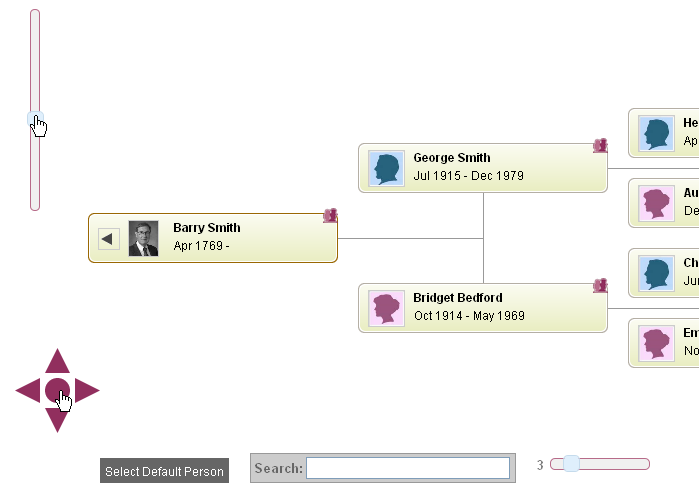
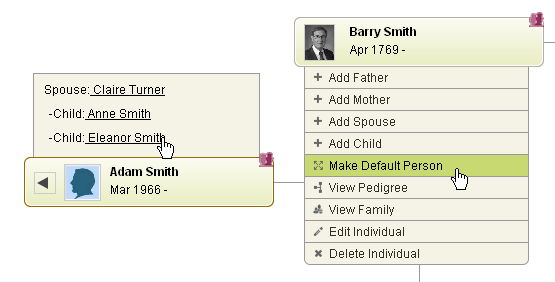
You can change your default individual within the tree by hovering over the preferred individual and selecting 'Make Default Person' from the menu.
Whichever individual is in the prominent position on the far left of your tree will also become the featured person when you select 'Family' from the main menu (see next section). Hovering your mouse over this individual will also show details of their siblings, spouse and children. You can change which individual is in the prominent left position by selecting ‘View Pedigree’ from the drop down menu.
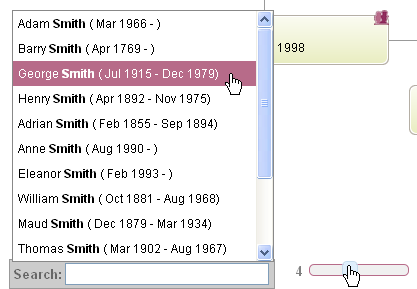
A Search box is also available at the bottom of the page to help you locate an individual not displayed on the present screen. Enter the name of the individual and all matching entries will be displayed above the search box. Select the individual from the list and they will become the default person on your Pedigree View.
Ancestors & Descendants
You can adjust your tree to view only ancestors or descendants of a particular person. Make sure that the person you wish to use is set as the default person on the Pedigree View. Then from the menu select either ‘Ancestors’ or ‘Descendants’.
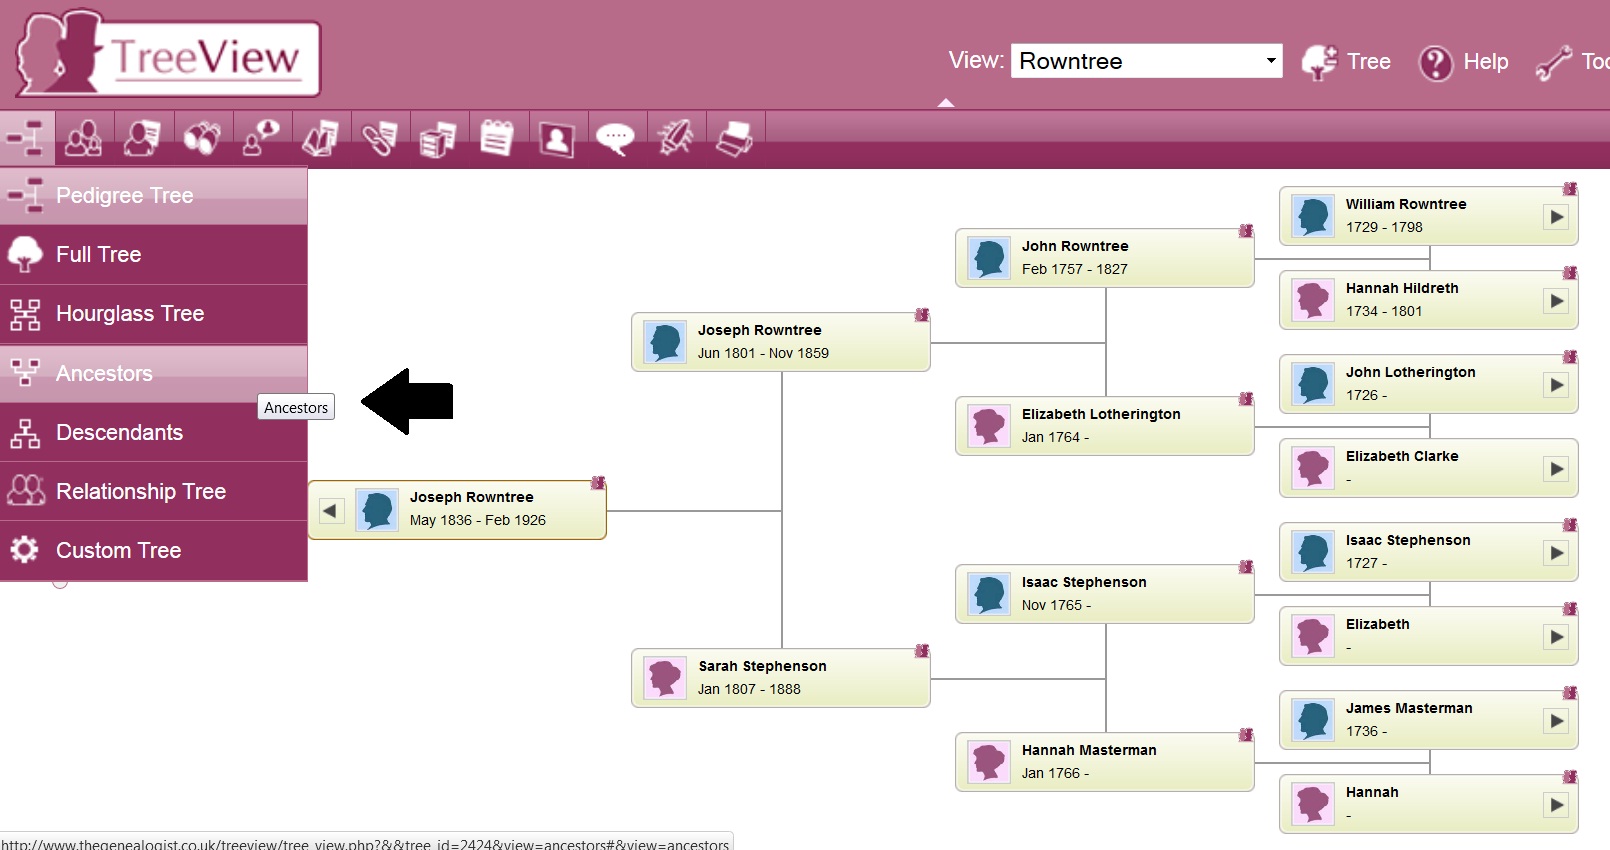
Your view will then immediately change with only direct ancestors or descendants displayed
