Editing an individual
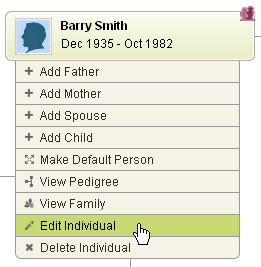
Once you have started your tree you can add extra details onto the individual, such as spouse and children by hovering your mouse directly over the person's name. A menu will appear which gives you the option to add relatives, and 'Edit Individual'. Clicking your left mouse button on the individual will also take you directly to the edit option.
Facts
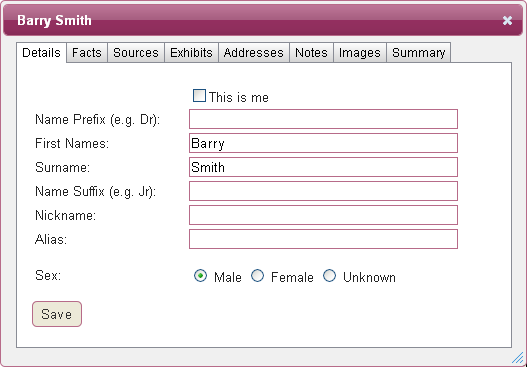
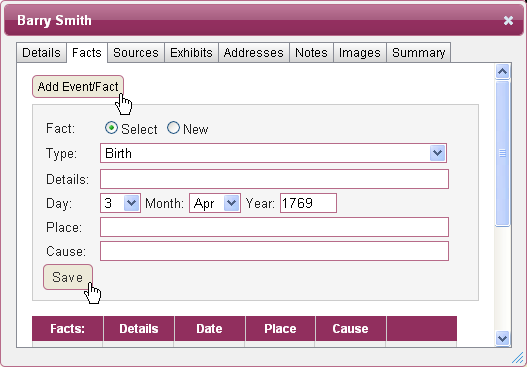
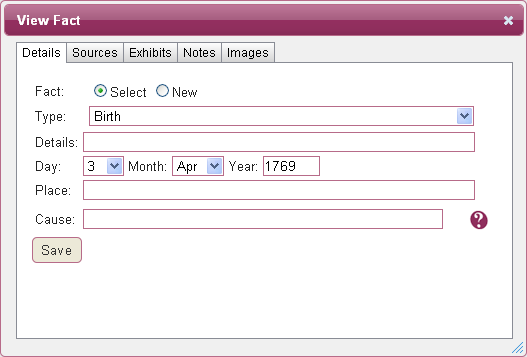
The edit option will initially show you the basic information on the person such as name, sex, date and place of birth. If you select 'Facts' this shows you which facts are currently stored and allows you to add new facts about various events in the person's life such as marriage, baptism, occupations, etc. To add new facts select the 'Add Event/Fact' link. Then select the type of fact you wish to enter, add the details and click on 'Save'. You can either choose a fact from the set list or click on ‘New’ and create your own. You'll receive confirmation that the fact has been saved successfully and returning to the window you will see the new fact listed on the main window.
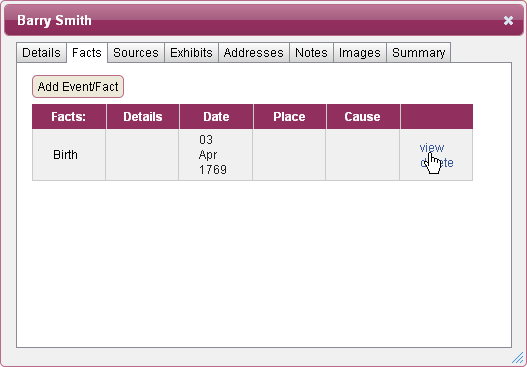
The fact will have 'view' and 'delete' options available, and selecting 'view' will then allow you to edit details of this fact, and add source information, exhibits, notes and images to the fact.
Sources
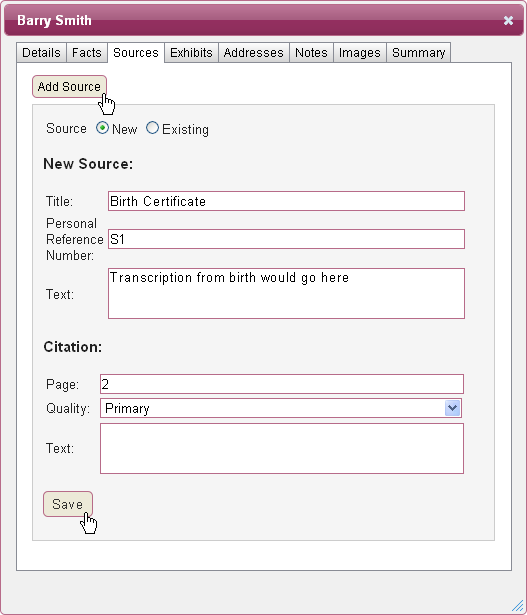
Adding source information is very similar to adding a fact, except sources can be added to individuals, facts, and notes. To add a source to a person, edit their details as mentioned above and select the 'Sources' option. Click on 'Add Source' and you now have an option of adding a new source or an existing source (Select the "Existing" option and then select the correct source). Now enter the details of the citation to this source, or if you wish to leave out the citation just leave the form blank and click "Save". You will then receive confirmation that this has been done. Close the window to proceed.
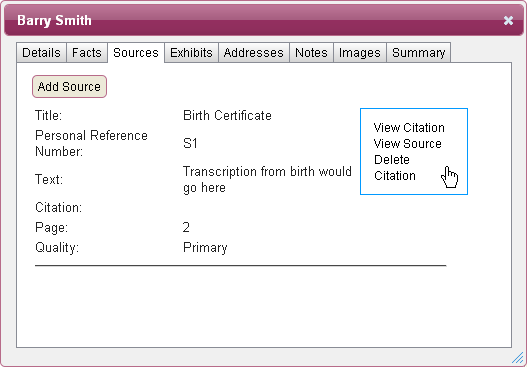
Once sources have been created for the individual, you will see 'view' and 'delete' options available. Selecting 'view' will allow you to edit the source, add repository information, details and notes.
Exhibits
Exhibits are pieces of evidence proving certain facts. For example, a census exhibit for an individual proves that a particular person lived at a particular place during that census year and gives extra information about that person from the census record. Whereas a BMD exhibit would prove a certain fact for a person or family. For example, a marriage BMD exhibit proves that a particular couple was married and registered at a particular time and place.
To learn how to add an exhibit from TheGenealogist, see the section on 'Exhibit Lists'.
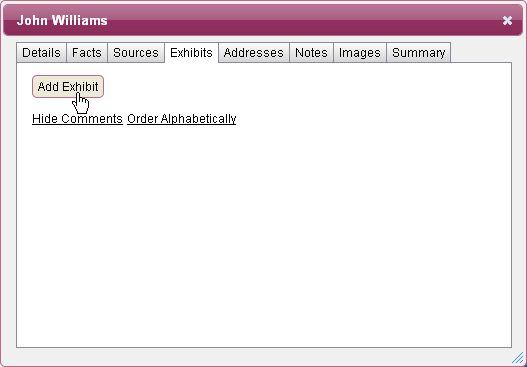
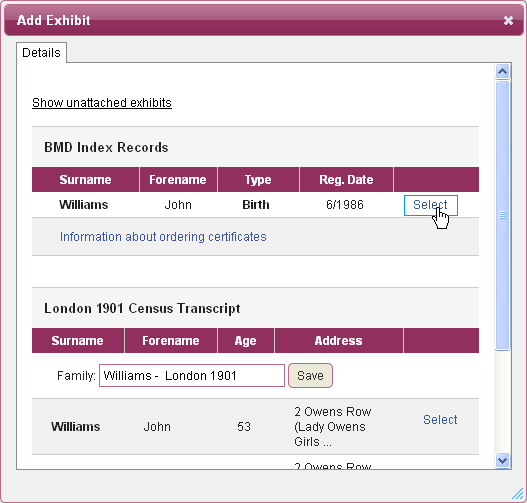
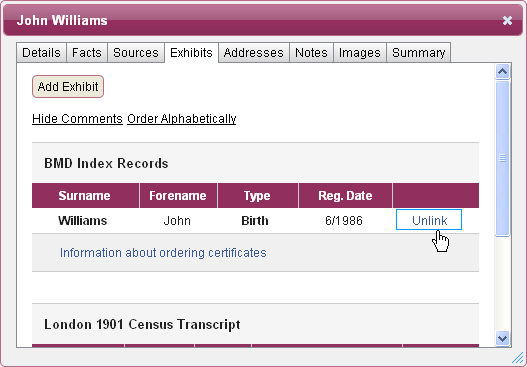
Attaching saved exhibits onto your TreeView individual can help you to remember where you found out information about them. To do this go to the 'Exhibit' option in edit individual, and click the "Add Exhibit" link. You will then be given a list of exhibits, just click 'select' on the exhibit you wish to attach and you will then save the exhibit to your individual's details. If you wish to detach the exhibit from the individual, just click "Unlink" next to the exhibit:
Addresses
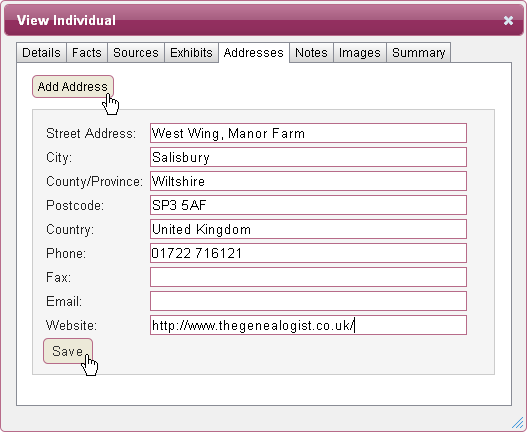
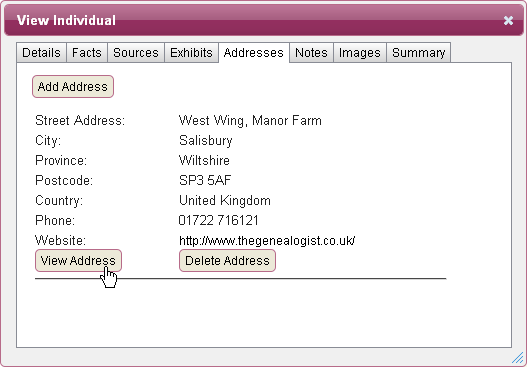
Selecting the 'Addresses' option will show you the full address and contact details for the individual. This can be useful if the person is a living relative as your tree can also become an address book. To enter a new address, click on the 'Add Address' option, enter known details and 'Save'.
Notes
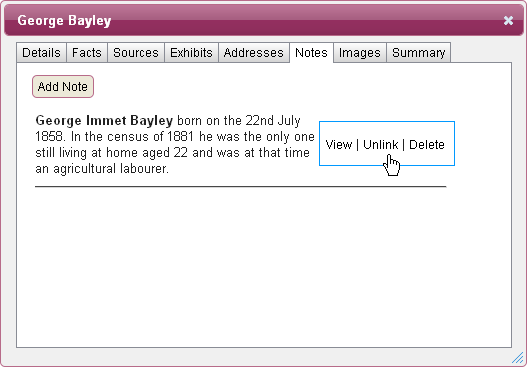
Use this section to add any miscellaneous information on the individual that you want to record. For example, any stories about the individual that have been passed down through the family, but you have yet to prove, or if there are any facts which you are not yet sure about and need to check later before adding to the individual.
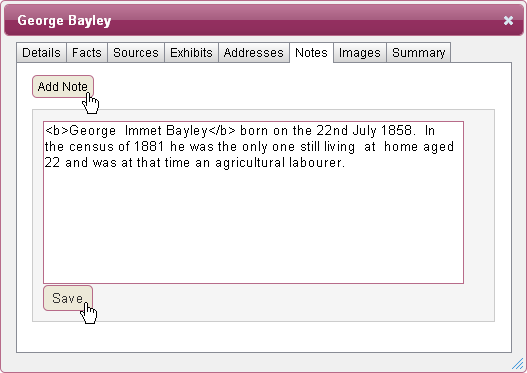
Select the 'Notes' option within edit individual, and 'Add Note', then enter your information into the box provided and click 'Save'.
Images
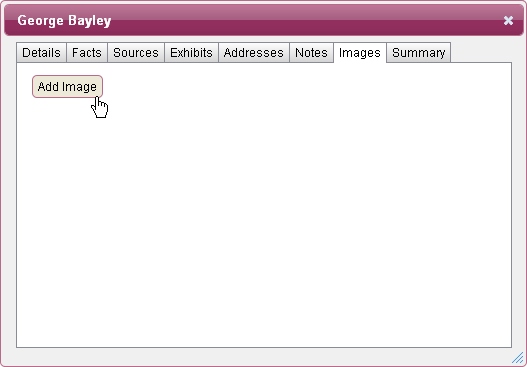
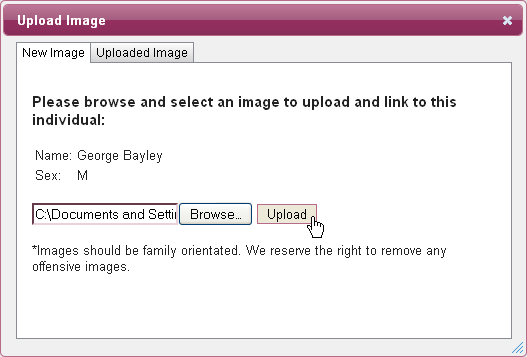
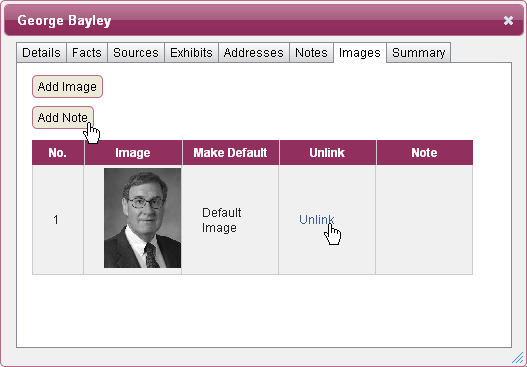
You can add an image or photo to the individual, by selecting 'Images' within edit individual. Click on 'Add Image', and you then have the option either to upload and add a new image or use an image which has already been saved in your 'My Photos' (See the TreeView Menu). If you already have an image saved that you want to use, click on 'Uploaded Image' and choose an image from those shown by clicking on 'Select'. If you want to use an image that has not yet been uploaded, go to 'New Image' and use the 'Browse' option to locate the file on your computer. Open the file and select 'Upload'. Any images you upload will also automatically be saved to your 'My Photos' folder.
Once an image has been selected or uploaded, it will be visible on your tree next to the name of the individual. You can unlink this image at any time, in the 'Images' options and also add a note to the linked image.
A maximum of 6 images can be uploaded free of charge, but a Premium subscription is required for unlimited uploads.
Summary
This option gives you an overall account of all the facts that you have added about the individual, and lists them in a narrative way so you can see the life and details of an individual in one glance.